Advanced Linux Shell Scripting for DevOps Engineers with User management
Day05

TASK-1 :Write a bash script createDirectories.sh that when the script is executed with three given arguments (one is directory name and second is start number of directories and third is the end number of directories ) it creates specified number of directories with a dynamic directory name.
Initial Setup:

Lets create the
createDirectories.shscript, I have create using it withvim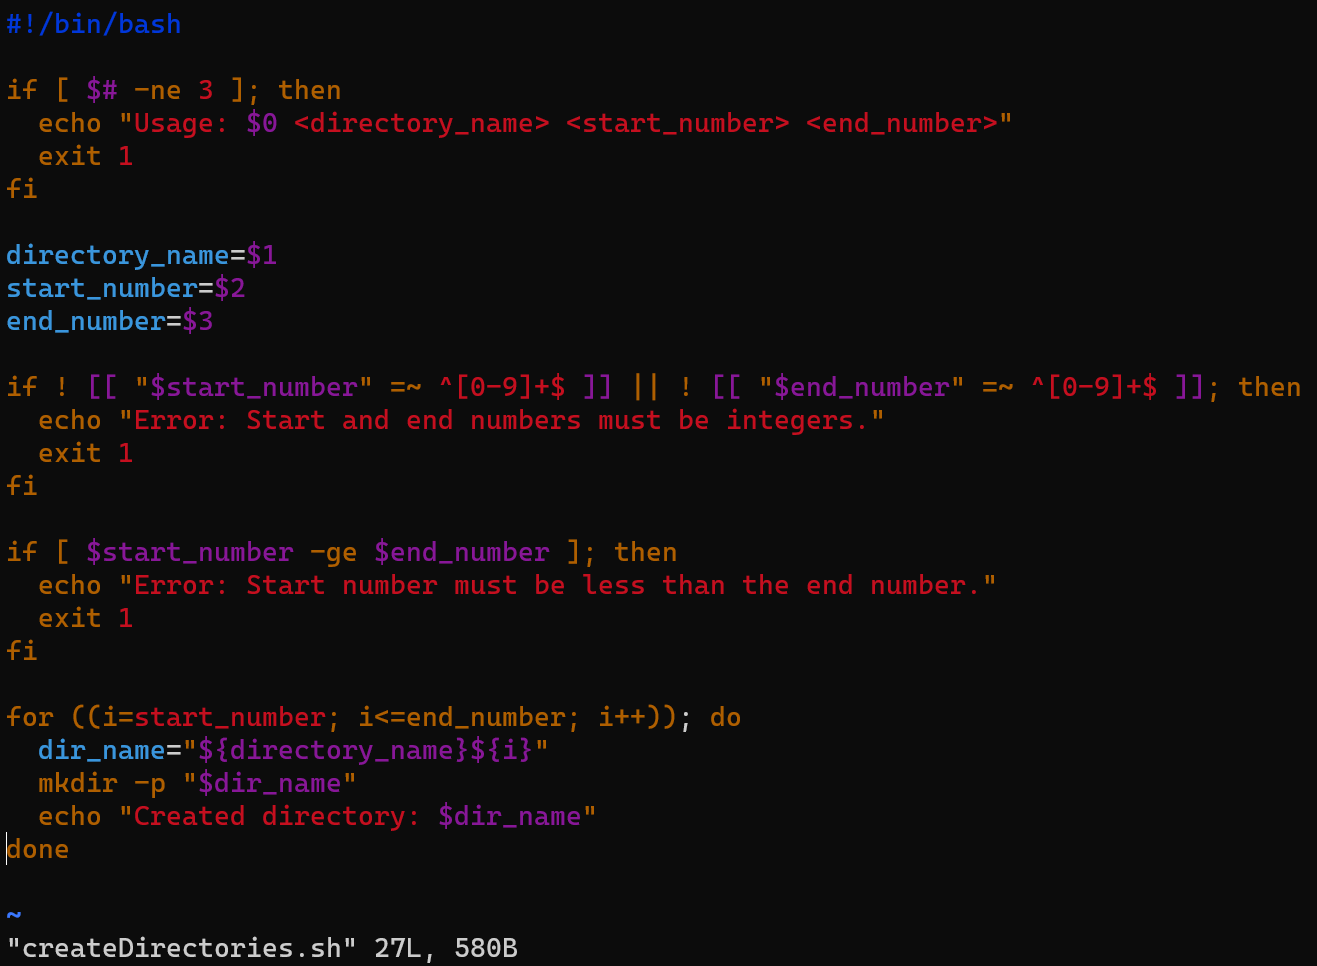
Let's execute the script
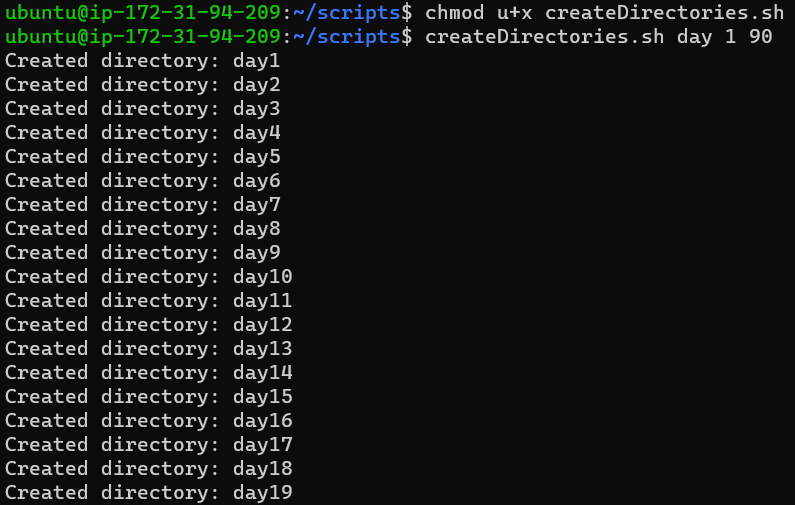
This will create 90 directories starting with directory name 'day' beginning from number 1.

Let's go through the script step by step:
#!/bin/bash: This is called a shebang and specifies the interpreter to be used to execute the script, which is/bin/bashin this case.if [ $# -ne 3 ]; then: Theifstatement checks the number of arguments passed to the script using$#. The variable$#holds the number of arguments passed to the script. In this case, we expect three arguments, so if the number of arguments is not equal to 3, the script will print the usage message and exit with a non-zero status.directory_name=$1,start_number=$2,end_number=$3: Here, we assign the first argument ($1) to the variabledirectory_name, the second argument ($2) to the variablestart_number, and the third argument ($3) to the variableend_number.Let's break down the line step by step:
 if ! [[ "$start_number" =~ ^[0-9]+$ ]] || ! [[ "$end_number" =~ ^[0-9]+$ ]]; then
   echo "Error: Start and end numbers must be integers."
   exit 1
 fi
[[ ... ]]: The double square brackets[[ ... ]]in Bash are used for conditional expressions and support more advanced pattern matching and comparison operators than the single square brackets[ ... ].$start_numberand$end_number: These are variables that hold the values of the second and third arguments passed to the script, respectively.=~: The=~operator inside the conditional expression is used for pattern matching. It allows us to check if a string matches a regular expression pattern.^[0-9]+$: This is a regular expression pattern that matches one or more digits (0-9) from the start (^) to the end ($) of the string. In other words, it ensures that the entire string consists of only digits and nothing else.
Now let's understand the entire conditional expression:
[[ "$start_number" =~ ^[0-9]+$ ]]: This part checks if the value ofstart_numberis a valid integer. It does this by checking if the value matches the regular expression pattern^[0-9]+$. Ifstart_numberis a valid integer (consisting only of digits), this condition evaluates to true.[[ "$end_number" =~ ^[0-9]+$ ]]: This part checks if the value ofend_numberis a valid integer, similar to the previous condition.!: The exclamation mark (!) in front of each condition negates the result. So, ifstart_numberis a valid integer, the first condition is true, but!makes it false. Similarly, ifend_numberis a valid integer, the second condition is true, but!makes it false.
The overall effect is that the entire conditional expression evaluates to true if either start_number or end_number (or both) is NOT a valid integer, meaning they contain non-digit characters or are empty. In that case, the script enters the if block and executes the following lines:
        echo "Error: Start and end numbers must be integers."
        exit 1
The script then prints an error message indicating that both start_number and end_number must be integers and exits with a status of 1, indicating that an error occurred during execution. This is to prevent the script from continuing if the arguments are not in the correct format.
if [ $start_number -ge $end_number ]; then: This checks ifstart_numberis greater than or equal toend_number. We wantstart_numberto be less thanend_number, so if it's not, the script will print an error message and exit.The
forloop is used to create directories with dynamic names. It iterates fromstart_numbertoend_number, and in each iteration, it creates a directory with the name formed by appending the current number to thedirectory_name.dir_name="${directory_name}${i}": This line constructs the dynamic directory name by concatenatingdirectory_nameand the current value ofi.mkdir -p "$dir_name": Themkdircommand is used to create directories. The-poption ensures that the parent directories are also created if they don't exist. We use the variabledir_nameto specify the name of the directory to be created.echo "Created directory: $dir_name": This line simply prints a message indicating that a directory has been created with the specified name.
Once the loop completes, the script has created all the directories with dynamic names like day1, day2, day3, and so on, up to day90 in this example.
Remember to run the script with three arguments, as shown in the example provided earlier:
./createDirectories.sh day 1 90
TASK-2: Create a Script to backup all your work done till now
Let's create a script named backup_script.sh to back up your work, and then we'll schedule it to run using crontab.
- Create the backup script:
Create a new file named backup_script.sh and add the following content to it
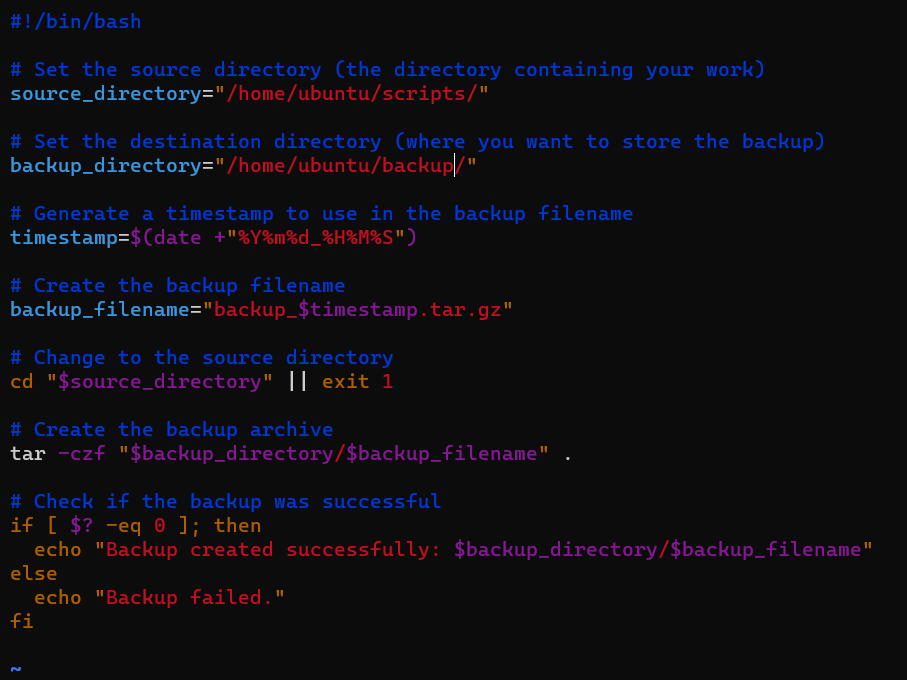
Make sure to replace /path/to/your/work with the actual path to the directory containing your work, and /path/to/backup/location with the directory where you want to store the backup.
- Make the script executable:
chmod +x backup_script.sh
- Schedule the script using
crontab:
Now, let's schedule the backup script to run daily at a specific time (e.g., 2:00 AM) using crontab.
Open your terminal and type:
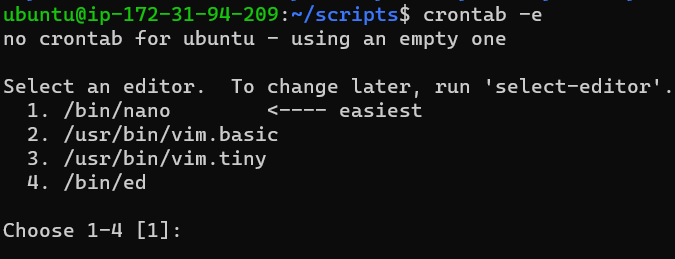
Hit Enter when prompted to choose, it will simply select nano editor.
Add the following line to the crontab file to schedule your backup script to run at every 2 minutes:
* * * * * /home/ubuntu/scripts/backup_script.sh
Save the changes and exit the editor.
Now, the backup script will run automatically at every 1 minutes and create a backup of all the files and directories in your work directory, storing it in the specified backup location with a unique timestamp in the filename.

TASK-3: What is Cron and Crontab
🕰️ Cron 🕰️: Cron is like a time-based job scheduler 🕰️ in Unix-like systems. It runs as a daemon in the background and helps you automate tasks automatically at predefined time intervals ⏰. These tasks are like little cron helpers 🤖 doing work for you when you're not around.
🗓️ Crontab 🗓️: Crontab is a command that allows you to interact with cron 🗓️ and set up your personal cron squad 🚀. Each user can have their own cron squad, and you can schedule tasks according to your specific needs.
The crontab commands include:
🖊️ crontab -e: This command lets you edit your cron squad in the default text editor, just like writing a to-do list 📝.
📜 crontab -l: This command lists the tasks you scheduled for your cron squad 📋.
❌ crontab -r: This command removes your cron squad, saying, "No more tasks for today, cron helpers! ⛔️"
The crontab format has five fields that define the schedule for the cron job 📅:
* * * * * command_to_run
| | | | |
| | | | +-- Day of the week (0 - 6) (Sunday=0 or 7) 🗓️
| | | +---- Month (1 - 12) 📆
| | +------ Day of the month (1 - 31) 🗓️
| +-------- Hour (0 - 23) ⏰
+---------- Minute (0 - 59) ⏰
Each field can contain a specific value (e.g., 5), a range of values (e.g., 1-5), a step value (e.g., */10 for every 10), or an asterisk * to represent "any" value. It's like setting your cron helpers' work hours 🏢 to keep your tasks on track.
🌟 Cron is like having a team of automated helpers working behind the scenes ⚙️, handling repetitive tasks like:
📂 Regular backups of your important files and documents (e.g., every day at 2:00 AM).
🛠️ System maintenance to keep your computer running smoothly (e.g., every week on Sunday at 3:00 AM).
♻️ Log rotations to manage log files and keep things tidy (e.g., every day at midnight).
With Cron and Crontab, you become the master of time 🧙♂️, delegating tasks to your cron helpers 🤝, and making your computing life a bit more magical 🌈!
TASK-4: User Management in Linux
Creating Users 🌟:
To create a new user, use the 🛠️
addusercommand:sudo adduser usernameExample:
sudo adduser john_doe
Modifying Users 🔄:
To change a user's password, use the 🔑
passwdcommand:sudo passwd usernameExample:
sudo passwd john_doeTo modify user information, such as full name or contact details, use the 📝
usermodcommand:sudo usermod -c "New Full Name" usernameExample:
sudo usermod -c "John Doe" john_doe
Granting Administrative Privileges 🔒:
To grant sudo access to a user, add them to the
sudogroup with the 🗝️usermodcommand:sudo usermod -aG sudo usernameExample:
sudo usermod -aG sudo john_doe
Deleting Users ❌:
To delete a user account, use the 🗑️
delusercommand:sudo deluser usernameExample:
sudo deluser john_doe
Switching Users ↔️:
To switch to another user's account, use the 🚪
sucommand:su - usernameExample:
su - john_doeYou will be prompted to enter the user's password. The
-option loads the user's environment, including their home directory and shell settings.
With these user management commands and emojis, you become the master of your Linux Ubuntu user kingdom 🏰, managing user accounts with ease! 🎉
TASK-5: Create 2 users and just display their Usernames
Create the users: Open your terminal and run the following commands to create two new users (replace
user1anduser2with the desired usernames)
Follow the prompts to set passwords and provide additional information for each user.
- Display their usernames using
awk: Now, you can useawkto extract and display the usernames from the/etc/passwdfile:
awk -F ':' '$3 >= 1000 {print $1}' /etc/passwd

This command filters out system users (whose User ID is less than 1000) and prints only the usernames of regular users with User ID greater than or equal to 1000.
When you run this command, it will display the usernames of the users you created (user1 and user2) and any other regular users on your system. System users like root, daemon, etc., will be excluded from the output.


