
Today we are going to discuss the Basic Linux Commands
To view what's written in a file.
The cat command is used in Linux to concatenate and display the contents of one or more files. Here are some examples of how you can use the cat command:
Display the contents of a single file:

This command will output the entire contents of the
filr.txtfile to the terminal.Display the contents of multiple files:
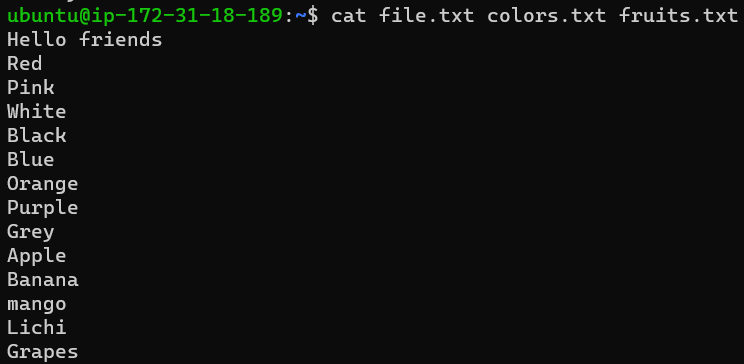
This command will concatenate and display the contents of
file.txt,colors.txt, andfruits.txtin the order specified.Concatenate files and redirect the output to a new file:
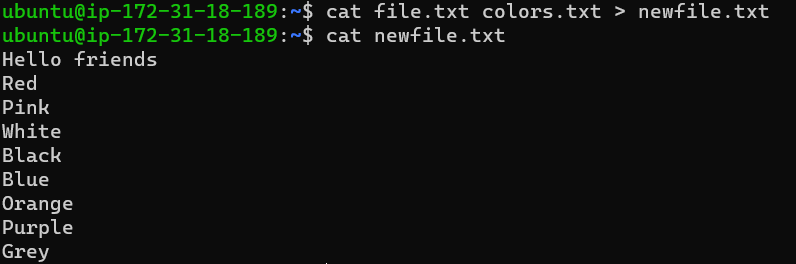
This command will combine the contents of
file.txtandcolors.txtand write them intonewfile. Ifnewfiledoes not exist, it will be created. If it already exists, its contents will be overwritten.Append the contents of one file to another:
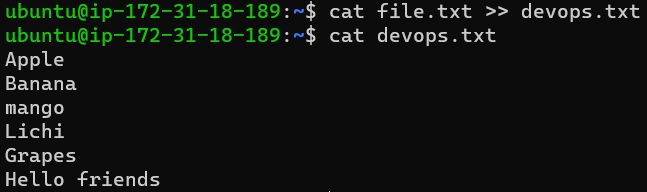
This command will append the contents of
file1to the end offile2. Iffile2does not exist, it will be created.Number the lines of a file while displaying its contents:

The
-noption adds line numbers to each line of the file, making it easier to reference specific lines.Display the contents of a file with line breaks replaced by empty lines:
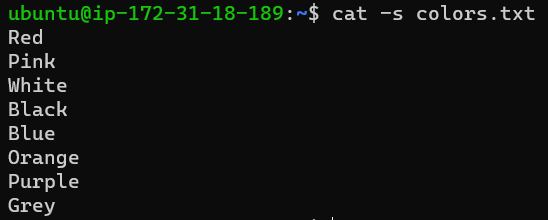
The
-soption squeezes multiple consecutive empty lines into a single empty line, making the output more compact.
These are just a few examples of the cat command usage. The cat command has many other options and functionalities, which you can explore further by referring to its manual page using the command man cat.
To change the access permissions of files.
To change the access permissions of files in Linux, you can use the chmod command. The chmod command allows you to modify the read, write, and execute permissions for the owner, group, and others. Here are some common examples:
Change the permissions using the octal notation:
chmod <octal_permissions> <file_name>
In this command, <octal_permissions> represents the desired permissions in octal form (e.g., 755, 644) and <file_name> is the name of the file you want to modify.
The octal notation assigns permissions based on a three-digit number, with each digit representing the permissions for the owner, group, and others, respectively. The digits can be calculated by adding the values of the desired permissions:
4: Read permission
2: Write permission
1: Execute permission
For example, to give read, write, and execute permissions to the owner, group and others, you would use chmod 777 file_name
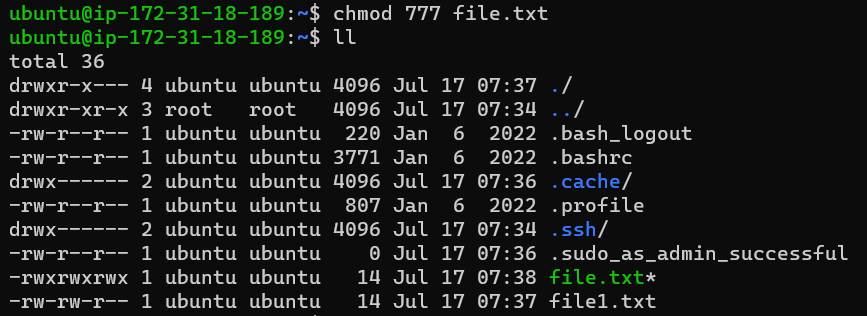
Change permissions using symbolic notation:
chmod <permissions> <file_name>
In this case, <permissions> represents the desired permissions using symbolic notation. The symbolic notation allows you to add or remove permissions based on the existing permissions.
Some symbols used in symbolic notation are:
+: Adds the specified permissions-: Removes the specified permissionsr: Read permissionw: Write permissionx: Execute permission
For example, to give execute permissions to the owner, you would use chmod u+x file_name .
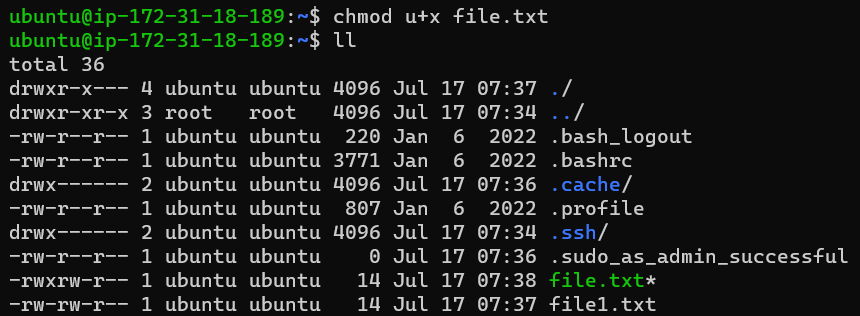
Note that changing file permissions requires appropriate privileges. If you are not the owner of the file or do not have sufficient permissions, you may need to use sudo or contact the system administrator for assistance.
To check which commands you have run till now.
In Linux, you can check the history of commands you have run in a terminal session using the history command. By default, the history command will display a list of previously executed commands along with their line numbers. Here's how you can use it:
Open your terminal.
Type the following command:
historyPress Enter.
This will display a numbered list of the commands you have executed in the current terminal session, with the most recent commands appearing at the bottom.
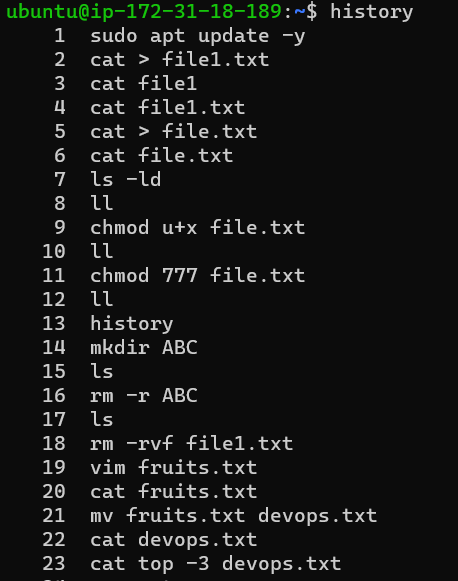
If you want to search for a specific command in your command history, you can pipe the output of
historyto thegrepcommand. For example, to search for commands containing the word "cat", you can use: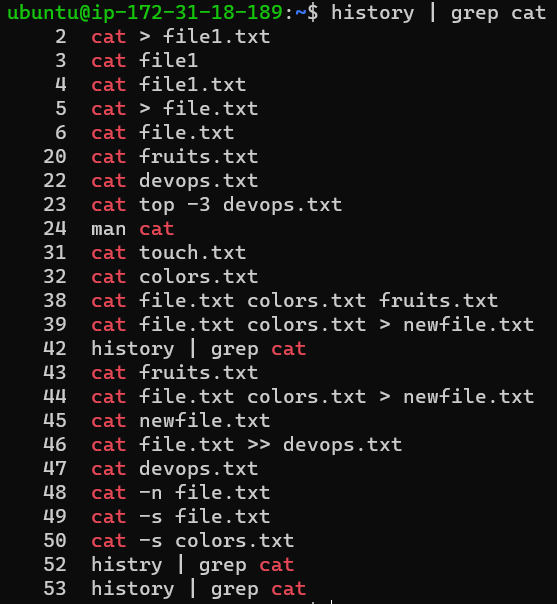
This will display a filtered list of commands that include the word "cat".
Please note that the command history is typically specific to each terminal session. If you open a new terminal or start a new session, the command history will be different. Additionally, the command history is usually limited to a certain number of entries, and older commands may eventually be truncated or removed from the history.
To remove a directory/ Folder.
To remove a directory (also known as a folder) in Linux, you can use the rmdir or rm command. Here's how you can use each of these commands:
rmdircommand: If the directory you want to remove is empty, you can use thermdircommand. It is specifically designed to remove empty directories. Here's the syntax:
Replace
directory_namewith the name of the directory you want to remove. For example, to remove a directory named "my_folder", you would usermdir my_folder.If the directory is not empty, the
rmdircommand will not work and will display an error message. In that case, you can use thermcommand with additional options.rmcommand: Thermcommand is more versatile and can be used to remove directories and their contents, including non-empty directories. Use the following syntax:

Options:
-ror-R: Enables recursive removal. This option allows you to remove directories and their contents, including subdirectories and files within them. It is commonly used when removing directories.-f: Forces the removal of files and directories without prompting for confirmation. It suppresses error messages when files or directories are not found.-i: Prompts for confirmation before removing each file. It asks for user confirmation individually for every file or directory specified.-v: Enables verbose mode, displaying detailed information about the removal process.
Example usages:

This command forcefully removes a file named filename.txt, suppressing any error messages if the file does not exist.
It's important to exercise caution when using the rm command, especially with the -r and -f options, as it permanently deletes files and directories without the possibility of recovery. Always double-check the files and directories you are removing to prevent unintended data loss.
To create a fruits.txt file and to view the content
To create a fruits.txt file and view its contents in Linux, you can use the touch command to create the file and a text editor such as cat, less, or nano to view its contents. Here's how you can do it:
Open your terminal.
Use the
touchcommand to create thefruits.txtfile:touch fruits.txtOnce the file is created, you can use a text editor to view and modify its contents. Here are a few examples:
Using cat:
ubuntu@ip-172-31-18-189:~$ cat fruits.txt
Apple
Banana
mango
Lichi
Grapes
This command will display the entire contents of fruits.txt in the terminal.
Add content in devops.txt (One in each line) - Apple, Mango, Banana, Cherry, Kiwi, Orange, Guava.
To add the specified content to a file named devops.txt, with each item on a new line, you can use the echo command in combination with the output redirection operator (> or >>). Here's how you can do it:
Open your terminal.
Run the following command to add the content to
devops.txt:echo -e "Apple\nMango\nBanana\nCherry\nKiwi\nOrange\nGuava" > devops.txtThe
-eoption is used withechoto enable interpretation of backslash escapes. Each fruit is separated by\n, which represents a new line.
This will display the contents of
devops.txtin the terminal, with each fruit on a separate line.
After following these steps, you will have added the specified content to the devops.txt file, with each fruit item on a new line.
To Show only top three fruits from the file.
If you want to display the top three fruits from a file in Linux, you can achieve that using the head command with the -n option. Here's an example assuming your file is named devops.txt:

This command will display the first three lines (top three fruits) from the devops.txt file.
The head command is used to output the beginning of a file, and the -n option specifies the number of lines to display. In this case, we set it to 3 to show only the top three fruits.
Note that this method assumes that the top three fruits are already in the correct order in the file. If you need the top three fruits in a specific order, you may need to sort the file before using the head command.
To Show only bottom three fruits from the file.
To display only the bottom three fruits from a file in Linux using the tail command, you can use the -n option with a value of 3. Here's an example assuming your file is named devops.txt:

This command will display the last three lines (bottom three fruits) from the devops.txt file.
The tail command is used to output the end of a file, and the -n option specifies the number of lines to display. By setting it to 3, we ensure that only the bottom three lines (fruits) are shown.
Make sure that the file contains at least three lines (fruits) for the command to work as expected. If the file has fewer than three lines, tail will output all the lines in the file.
Using tail -n 3 is a straightforward way to display the bottom three fruits without the need for sorting or additional commands.
To create another file colors.txt and to view the content.
To create a file named colors.txt and view its contents in Linux, you can use the touch command to create the file and a text editor such as cat to view the content. Here's how you can do it:
Open your terminal.
Use the
touchcommand to create thecolors.txtfile:touch colors.txt
Once the file is created, you can use a text editor to view and modify its contents. Here are a few examples:
Using
cat:cat colors.txtThis command will display the entire contents of
Colors.txtin the terminal.
Add content in Colors.txt (One in each line) - Red, Pink, White, Black, Blue, Orange, Purple, Grey.
To add the specified content to a file named colors.txt using the Vim text editor, you can follow these steps:
Open your terminal.
Type the following command to open the
colors.txtfile in Vim:vim colors.txtOnce Vim opens, press the
ikey to enter insert mode. This allows you to start editing the file.Copy and paste the content you want to add to
colors.txt. In this case, the content is:Red Pink White Black Blue Orange Purple GreyPress the
Esckey to exit insert mode.Type
:wqand press Enter to save the changes and exit Vim.
Now you have added the specified content to the colors.txt file using the Vim text editor. You can view the contents of the file using the cat command or open it again with Vim to verify the changes.
To find the difference between fruits.txt and colors.txt file.
To find the differences between two files, such as fruits.txt and colors.txt, in Linux, you can use the diff command. The diff command compares two files line by line and displays the differences between them. Here's how you can use it:
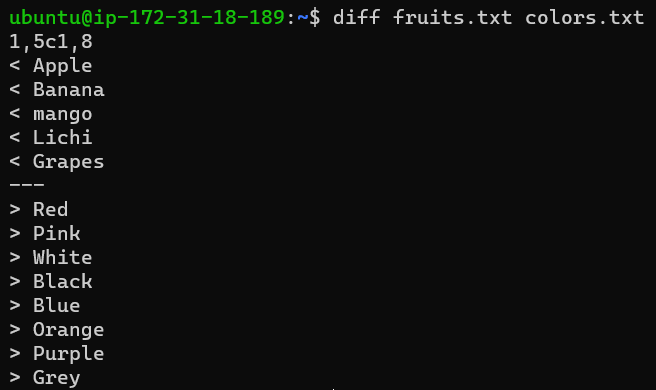
The command above will compare the contents of fruits.txt and colors.txt and display the differences between the two files. The output will indicate which lines are unique to each file or if there are any differences within matching lines.
If you want to ignore the case sensitivity during the comparison, you can use the -i or --ignore-case option:
diff -i fruits.txt colors.txt
This will perform a case-insensitive comparison between the two files.
Note that the diff command may produce a large output if there are many differences between the files. In such cases, you may want to consider redirecting the output to a file for easier analysis:
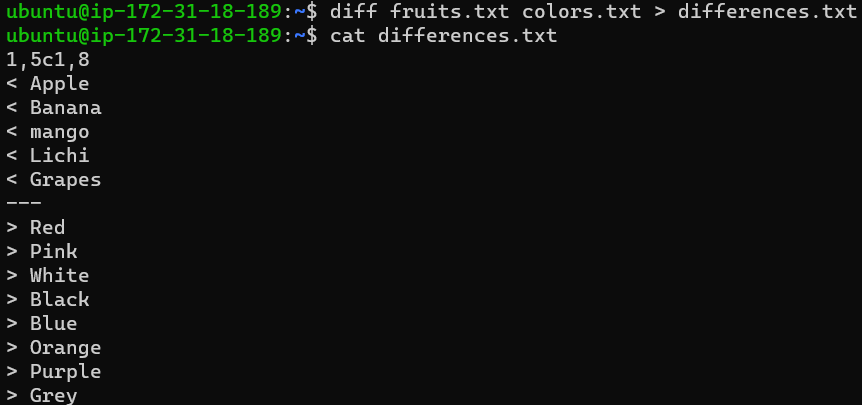
This command will save the differences to a file named differences.txt instead of displaying them on the terminal. You can then open differences.txt to view the results using a text editor or any other suitable tool.
Remember, practice makes perfect. As you gain more experience, you'll uncover additional Linux commands and expand your proficiency. Happy exploring!


